A Campervan & The Open Road
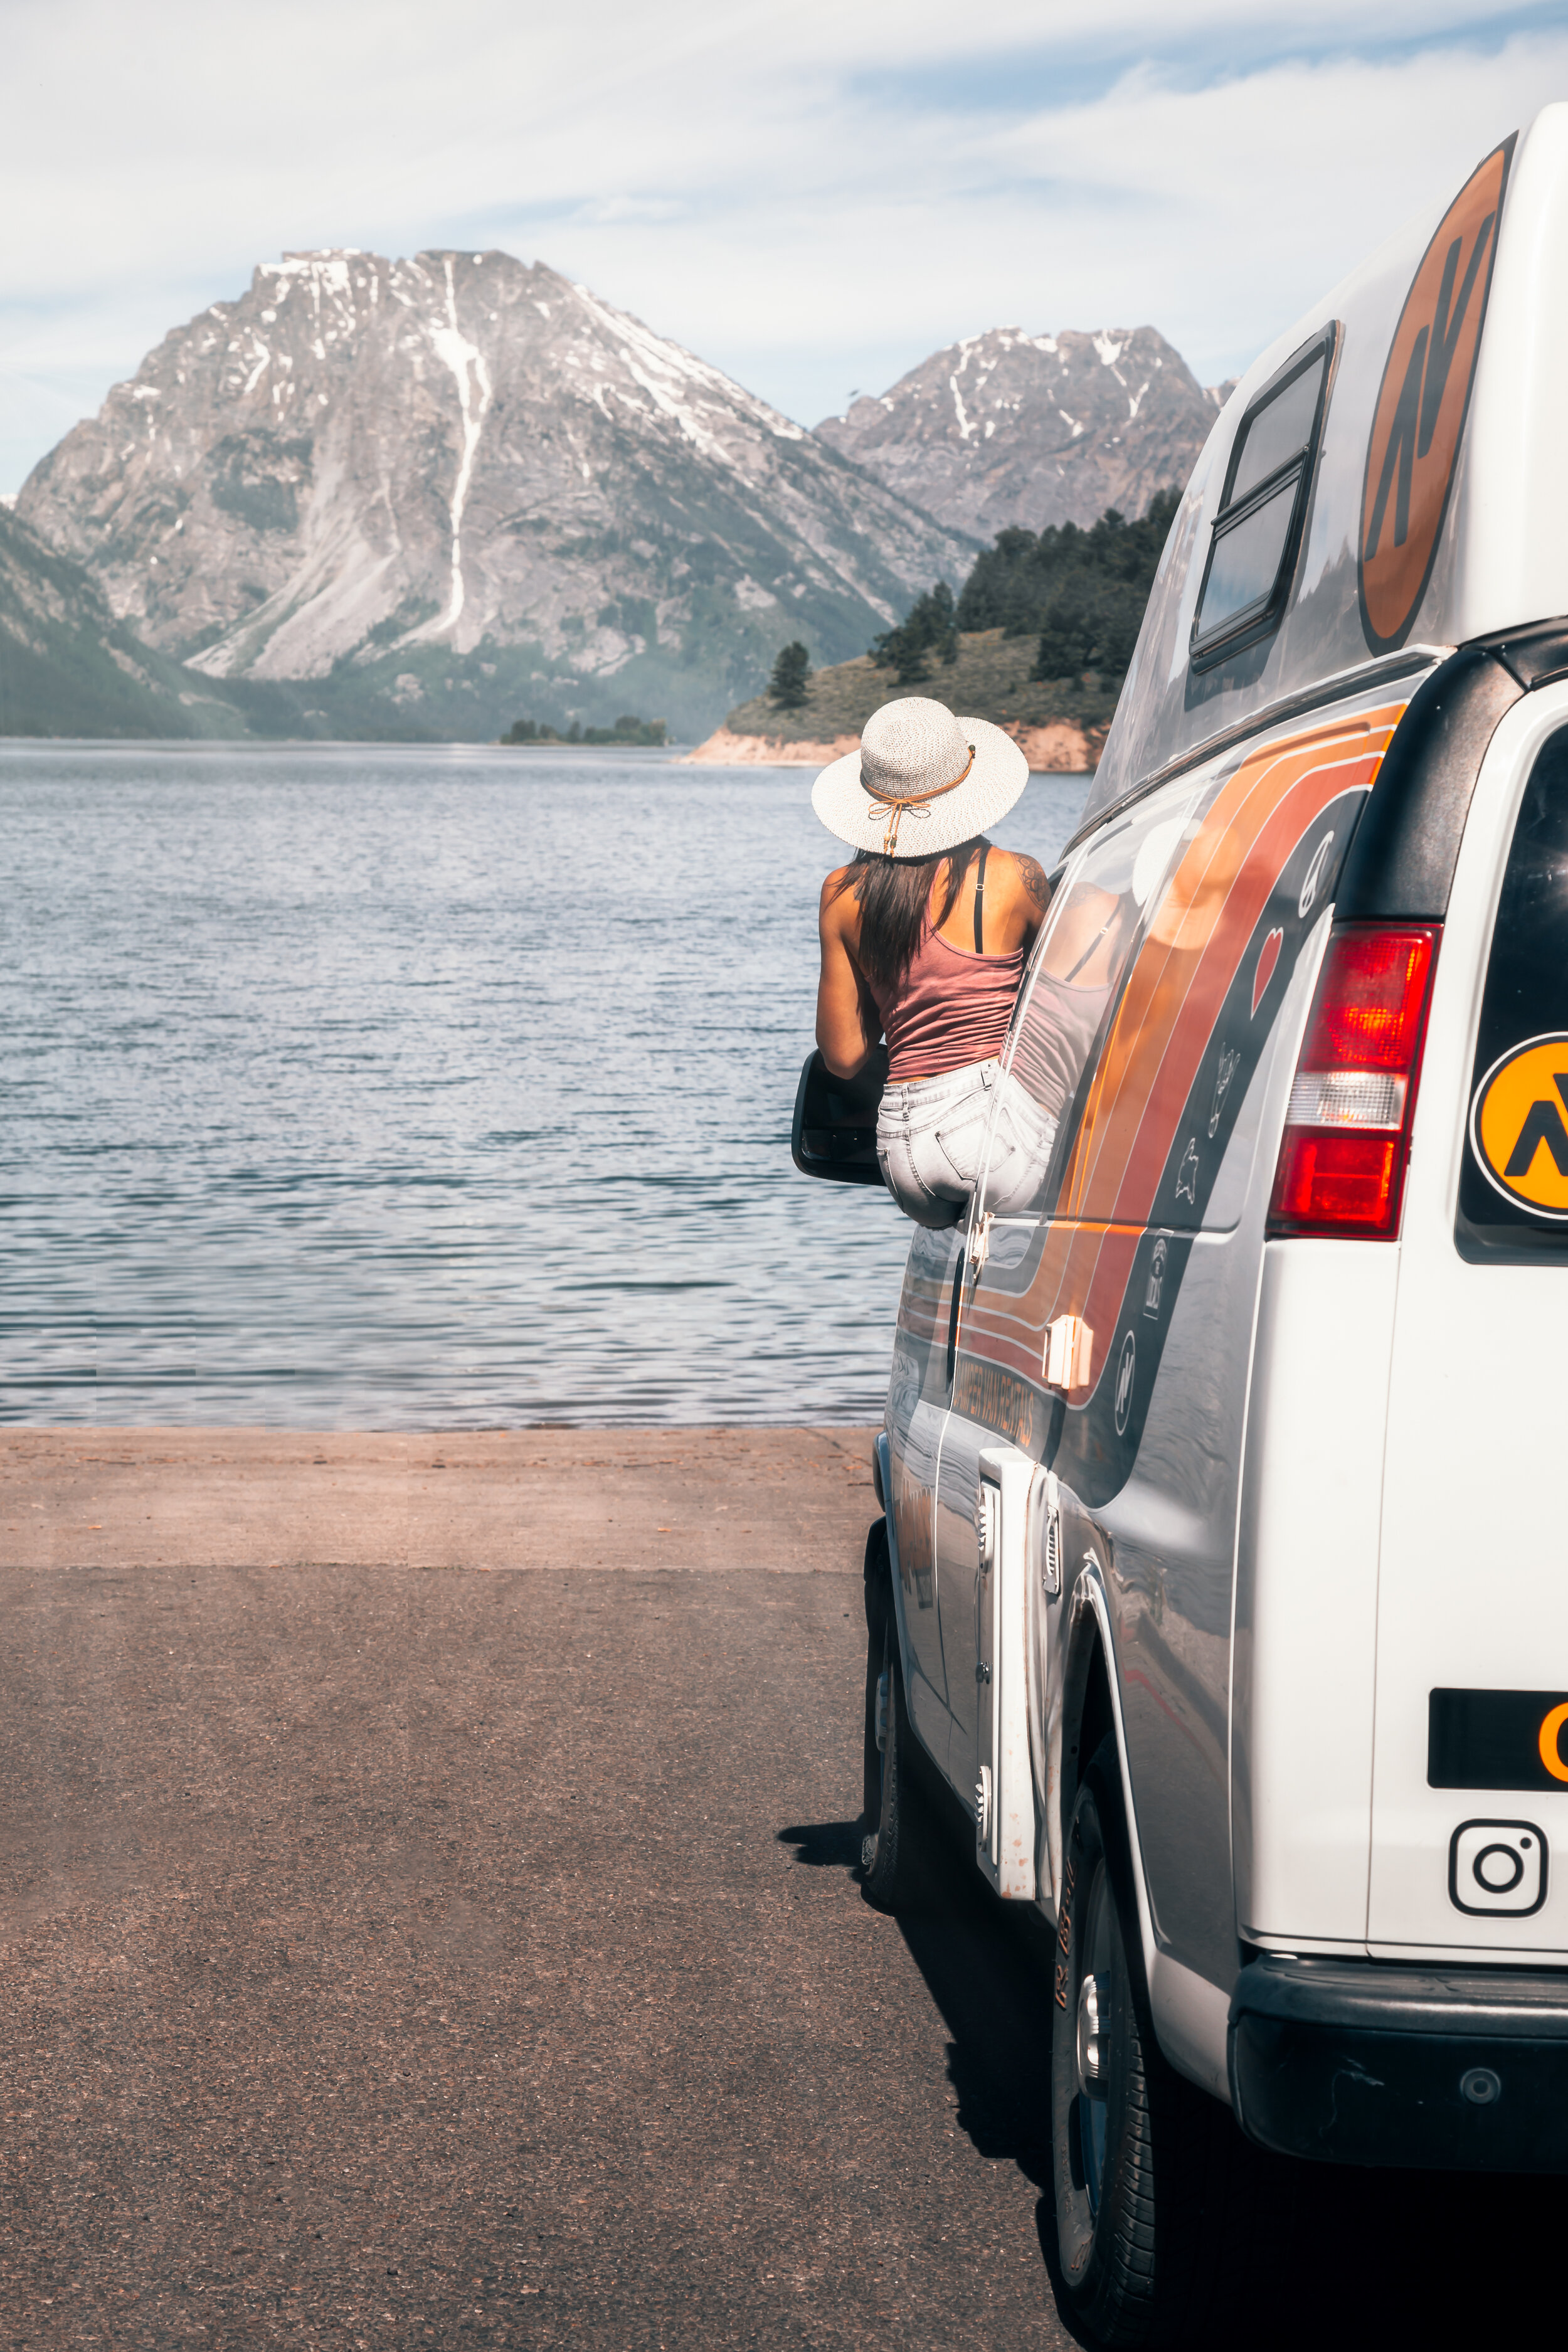
Grand Teton National Park, June 2021
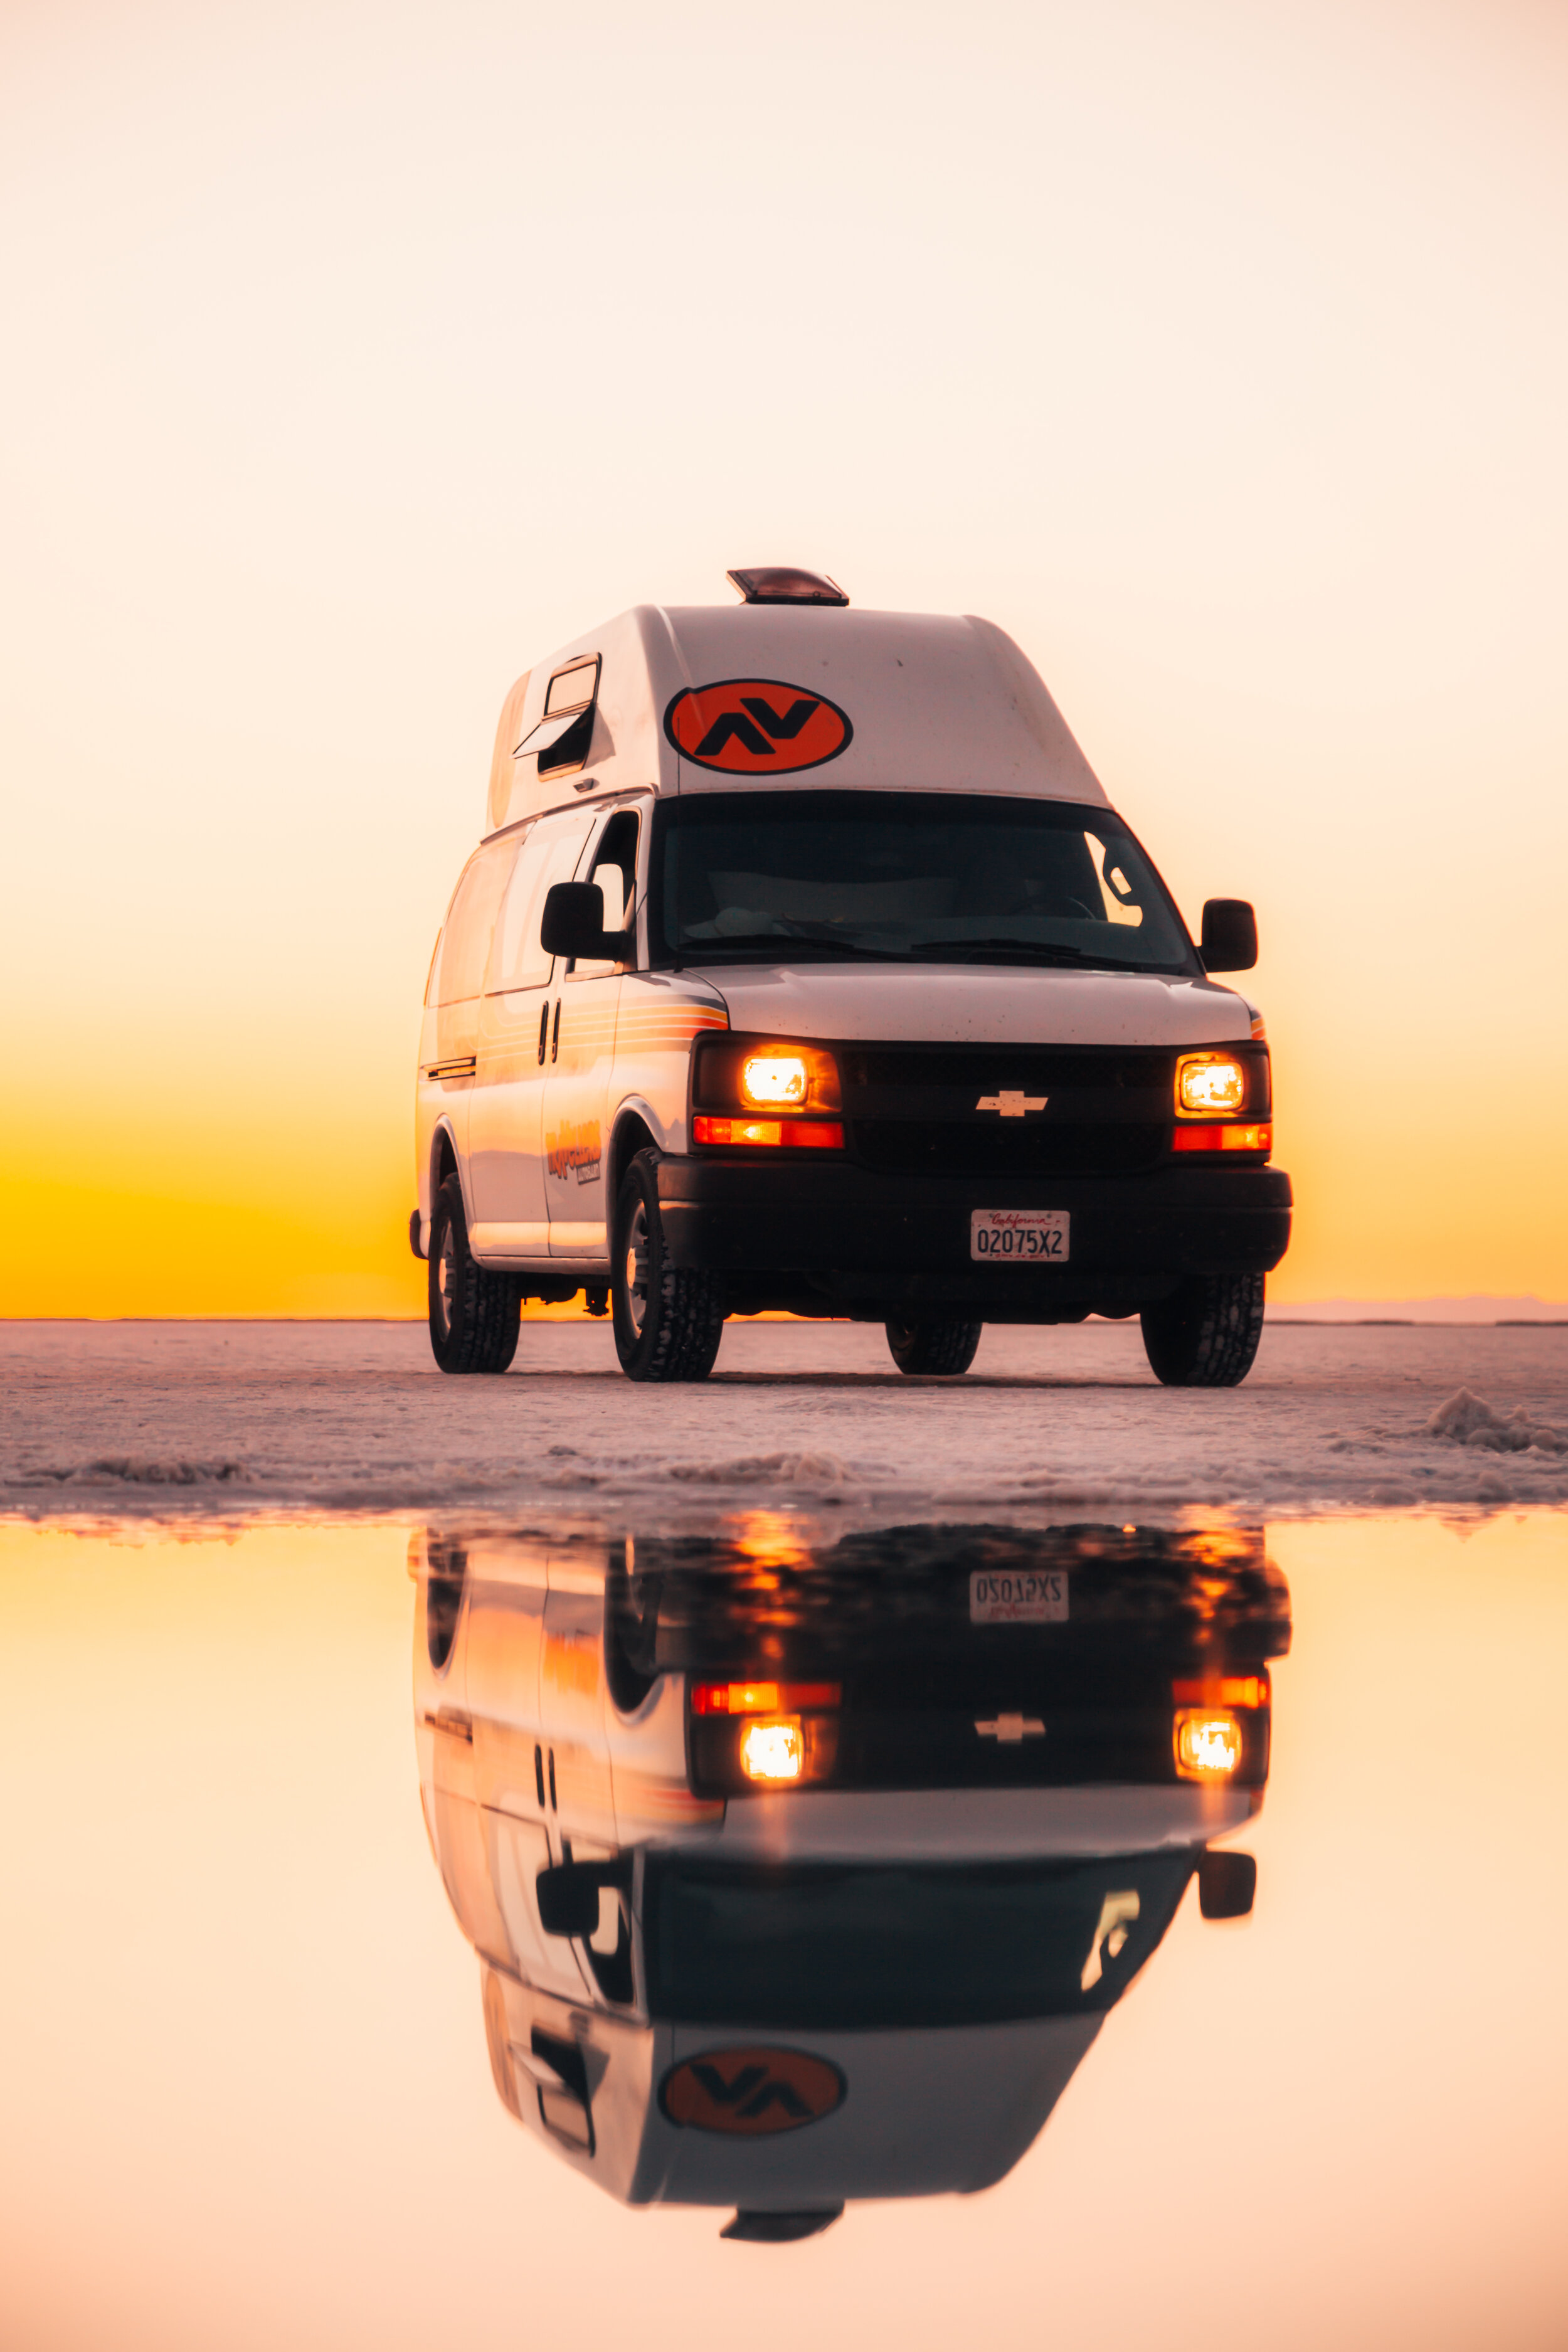
Living In A Campervan
In June 2021, I took a road trip with my best friend Alex from the San Francisco Bay Area over to Wyoming to visit the Tetons and Yellowstone (two awesome National Parks — I highly recommend visiting both if you’re ever given the time and opportunity). Knowing we would spend a lot of time on the road and not nearly enough time sleeping, we both agreed our best route would be either renting a campervan or a RV for a week. After a solid discussion and days of research, our decision landed us on Travellers Autobarn’s homepage. We searched through their campervan options, and we decided to rent out their Kuga Campervan for our week long roadtrip. Over the course of a week living in a campervan, I took note of some pros and cons and I’m ready to share them all with you below, while also including an itinerary!
Pros and Cons.
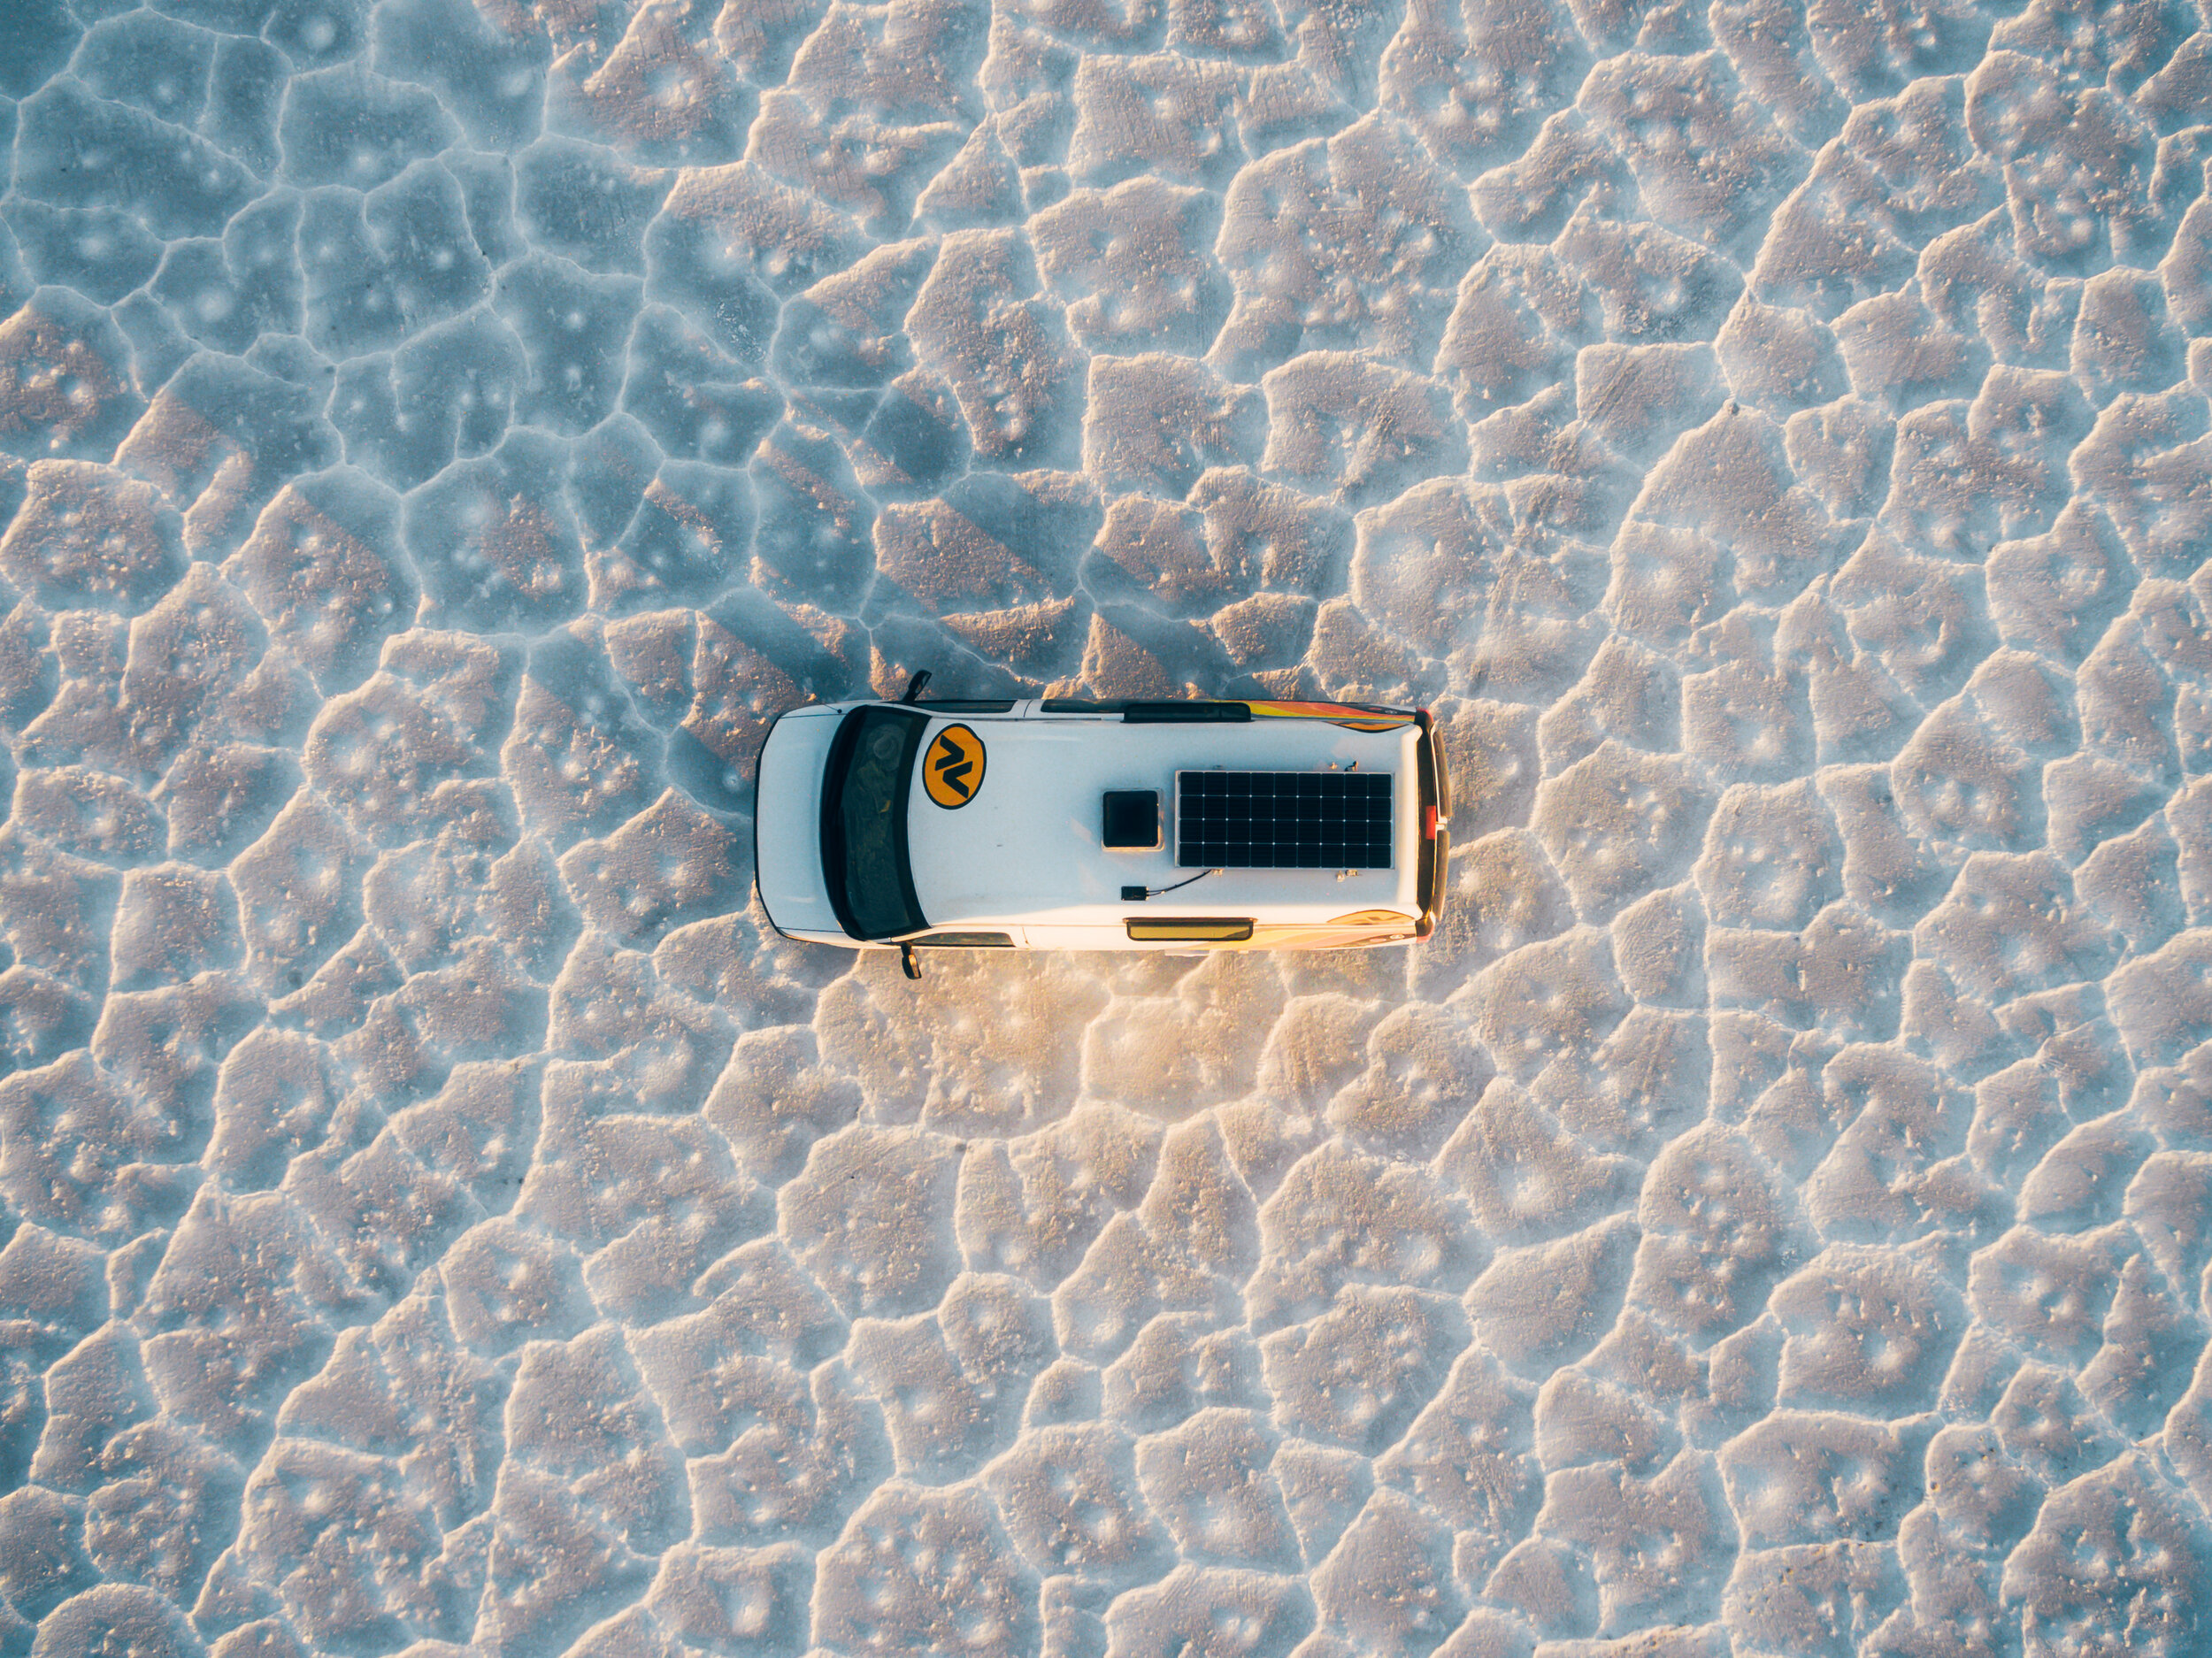
Gas is…how much!? 2,946 miles. It’s a good thing Travellers Autobarn gives free unlimited miles, because I couldn’t even believe we drove that much within 7 days. That’s normally how much I drive on my typical 2 week long road trip. From the San Francisco Bay Area in California, we drove through Nevada into Utah. Then through Idaho, into Wyoming and eventually crossing over the corner of Montana. Back into Idaho, and back into Utah… and back in Nevada and of course straight to the Bay Area from there. We crossed over so many county lines, and saw gas prices ranging from $2.75 to $4.50. As you can imagine, a campervan will cost more than a normal car to fill up when on E. On average, we spent anywhere from $80-95 to fill up the Kuga Campervan. While that does sound pricy, you need to keep in mind you don’t need to pay for sleeping accommodations because that comes with the campervan! Not having a hotel cost cuts off so many extra expenses from your typical trip.
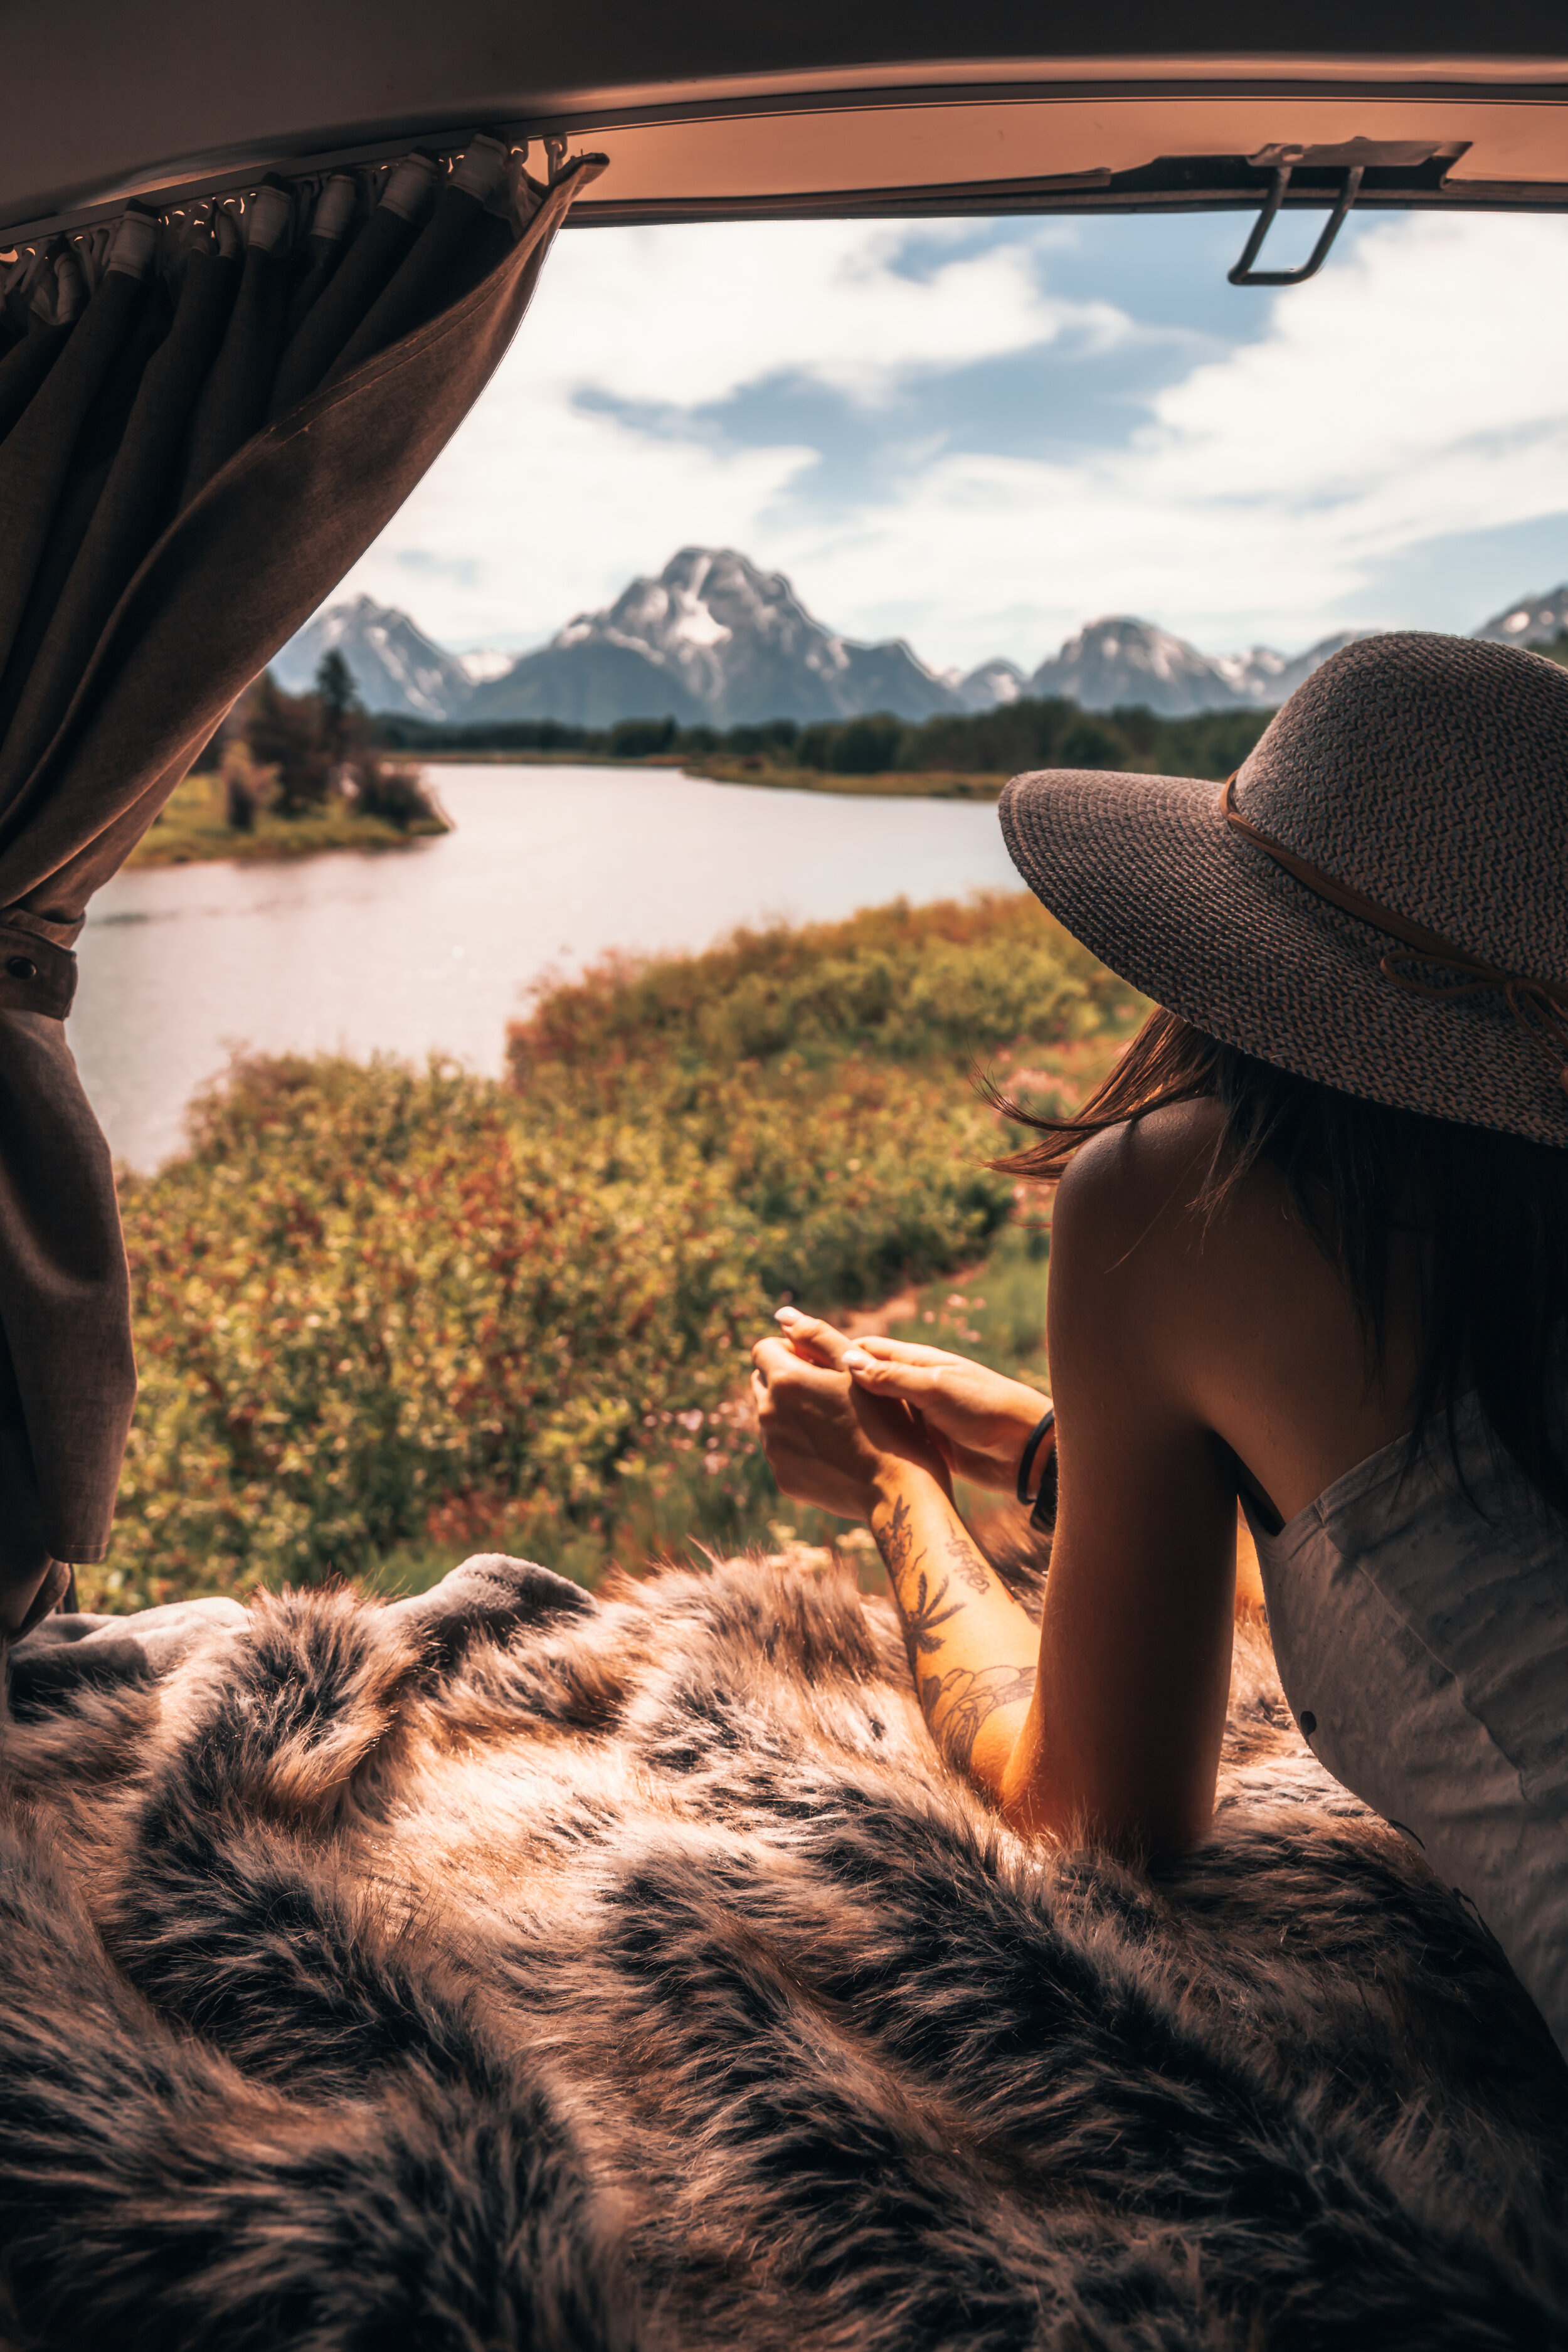
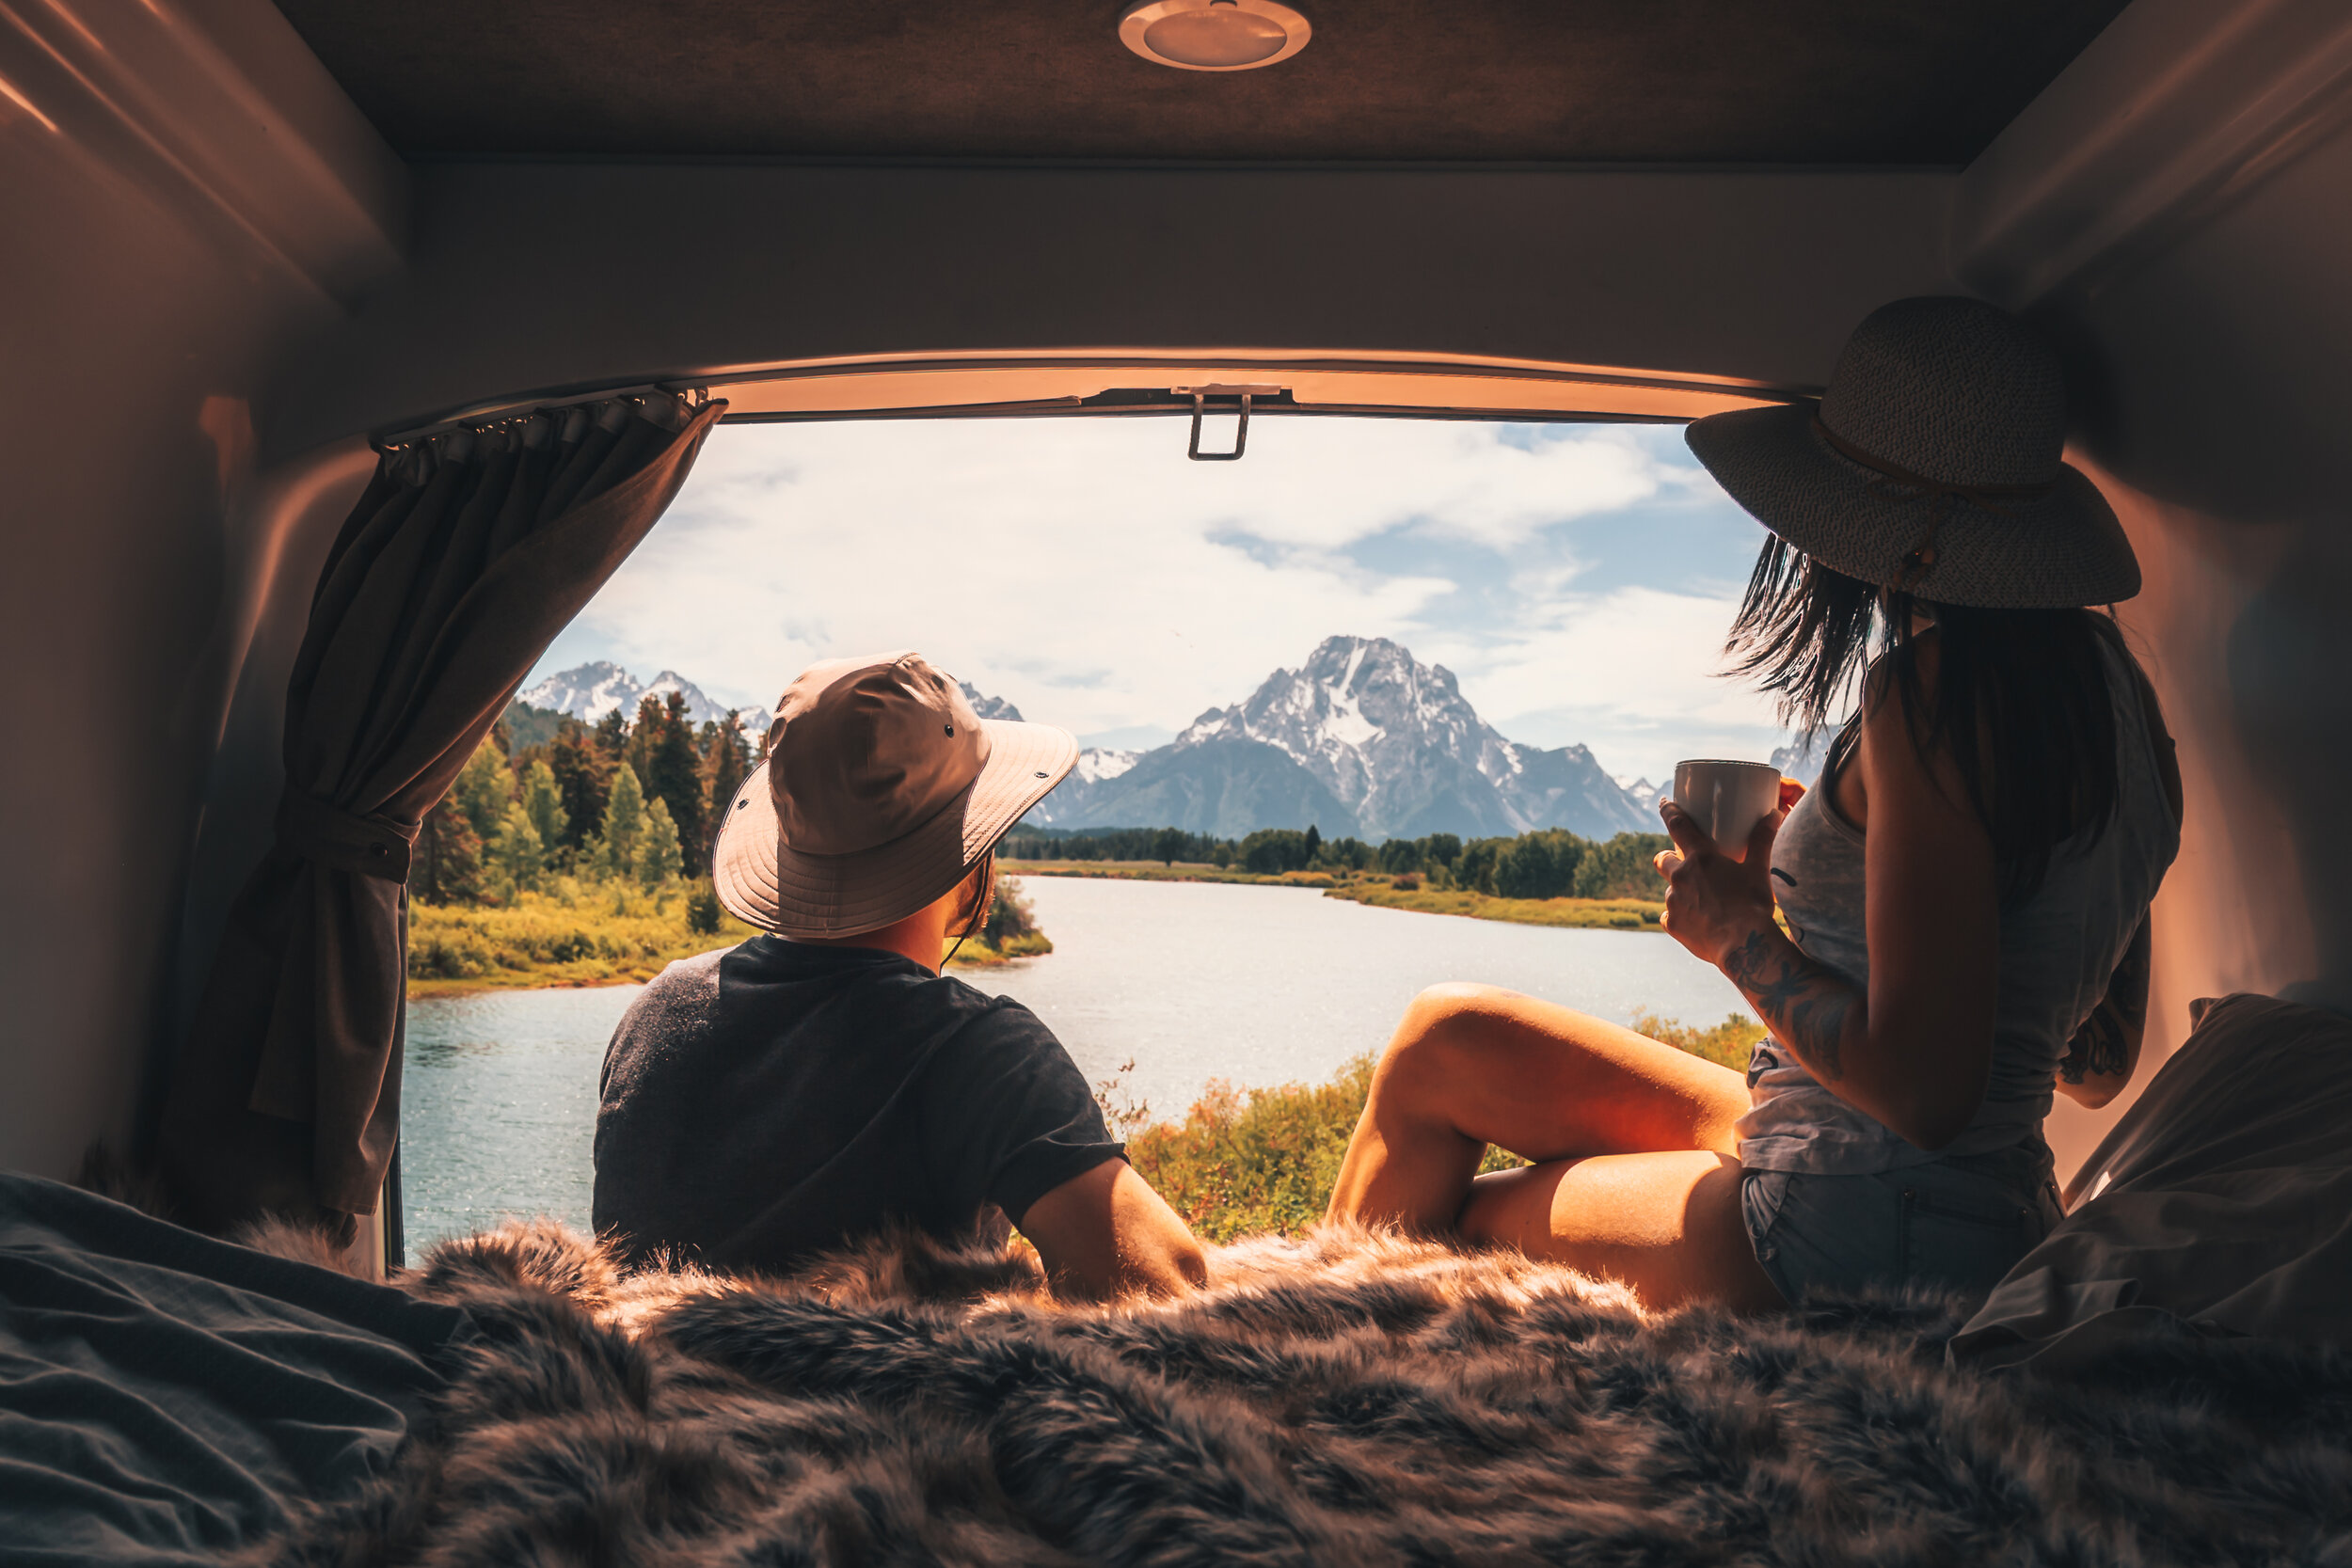
Was it even comfortable to sleep in? While my roadtrip only consisted of me and Alex, the Kuga Campervan is spacious enough to actually comfortably fit (3) people. It has a main bed, and there’s also a second bed that can easily be made toward the roof. In the front, as well, there are (3) seats so while you’re on your way driving to your next destination everyone can be seated safely. Travellers Autobarn does include bedding, towels, pillows, and sleeping bags within the van, meaning that’s a few less things you need to worry about bringing. As far as cushioning goes for the beds, the regular cushions for the benches all create the cushion for the lower bed, and the upper bed has it’s own cushions up there to use. Truthfully, I was very comfortable the few hours I spent sleeping.
So did you cook, or what? If you didn’t know, the Kuga Campervan comes with a mini fridge, a microwave, a sink, a gas stove, and a propane cylinder tank (accessible on the outside) to power the stove. The mini fridge is super useful, but I also brought along a cooler I had from Pelican because we had gotten a bunch of groceries for this trip prior to the start and the mini fridge couldn’t hold everything. The mini fridge does, however, have a nob where you can switch it’s settings between 0-5 accommodating either your frozen goods or your refrigerated goods. The microwave I didn’t use, but it only works when the campervan is plugged into a powered campsite. The sink was so useful! I loved not having to worry about wasting our bottled water on cleaning anything we used to cook our meals. There was no hot water, but I never had issues (even at home) cleaning dishes with cold water as long as you’re not letting the dirty dishes just sit there. You can also refill your water supply if you park at a campsite as they normally have a water supply at every site. The gas stove and propane tank were so essential. We were sitting by Oxbow Bend in the Tetons eating full on burgers for lunch while people surrounding us stared with hunger. This was the biggest game changer for us; not needing to worry about if we can have an actual protein-filled meal.
Did you need an endless supply of portable chargers? No. If you know me, you know I bring my portable chargers everywhere, every day. But I actually didn’t need any. There are USB outlets within the campervan, as well as a car charger port and actual 120V plug-ins (the 120V plug-ins also only work if you’re plugged into a powered campsite). The only time I needed my portable charger was if I wasn’t in the campervan at all during the day.
What didn’t you need to worry about? A lot! Something I really loved about the Kuga Campervan is that the roof is filled with solar panels. This means so much of the car’s amenities are powered up without you being plugged into a powered campsite — as long as the sun is out and shining, of course. The many lights inside the van? Solar powered. The fridge? Solar powered. The USB outlets (after the car is off)? Solar powered. Travellers Autobarn covers a lot of what you normally would need to worry about. Within this rental, we were given: a full kitchenette, sleeping accommodations with bedding, camping chairs for outdoor use, tons of storage, 120V/USB plug-ins, lights, unlimited miles, 24/7 roadside assistance, a road atlas, and access to a campground app.
Be real and explain your hygiene for this trip. I’m not even going to lie and say I showered every day. It didn’t happen and it just wasn’t possible. The difference between a RV and a campervan is that a campervan does not have a bathroom or shower. That being said, the campervan does have running water, and we had multiple 1-gallon bottles of water. Brushing our teeth was not a big deal, that’s always doable anywhere and everywhere. But for showers, there were definitely days we pulled over at a discreet location and used a washcloth, body wash, and bottled water to bathe ourselves. Also if you weren’t aware, some national parks do offer public showers! They’re not free, but they are cheap and offer a decent amount of time (if not unlimited minutes) to use them. This was our go to for when we were in the Tetons.
California to Wyoming: A Week Long Itinerary
2,946 miles. Thats a long drive, especially to make by yourself. However, it’s totally doable with two people. Listed below is my itinerary, with only some photo locations listed for the sake of keeping the environment clean and without graffiti/trash.
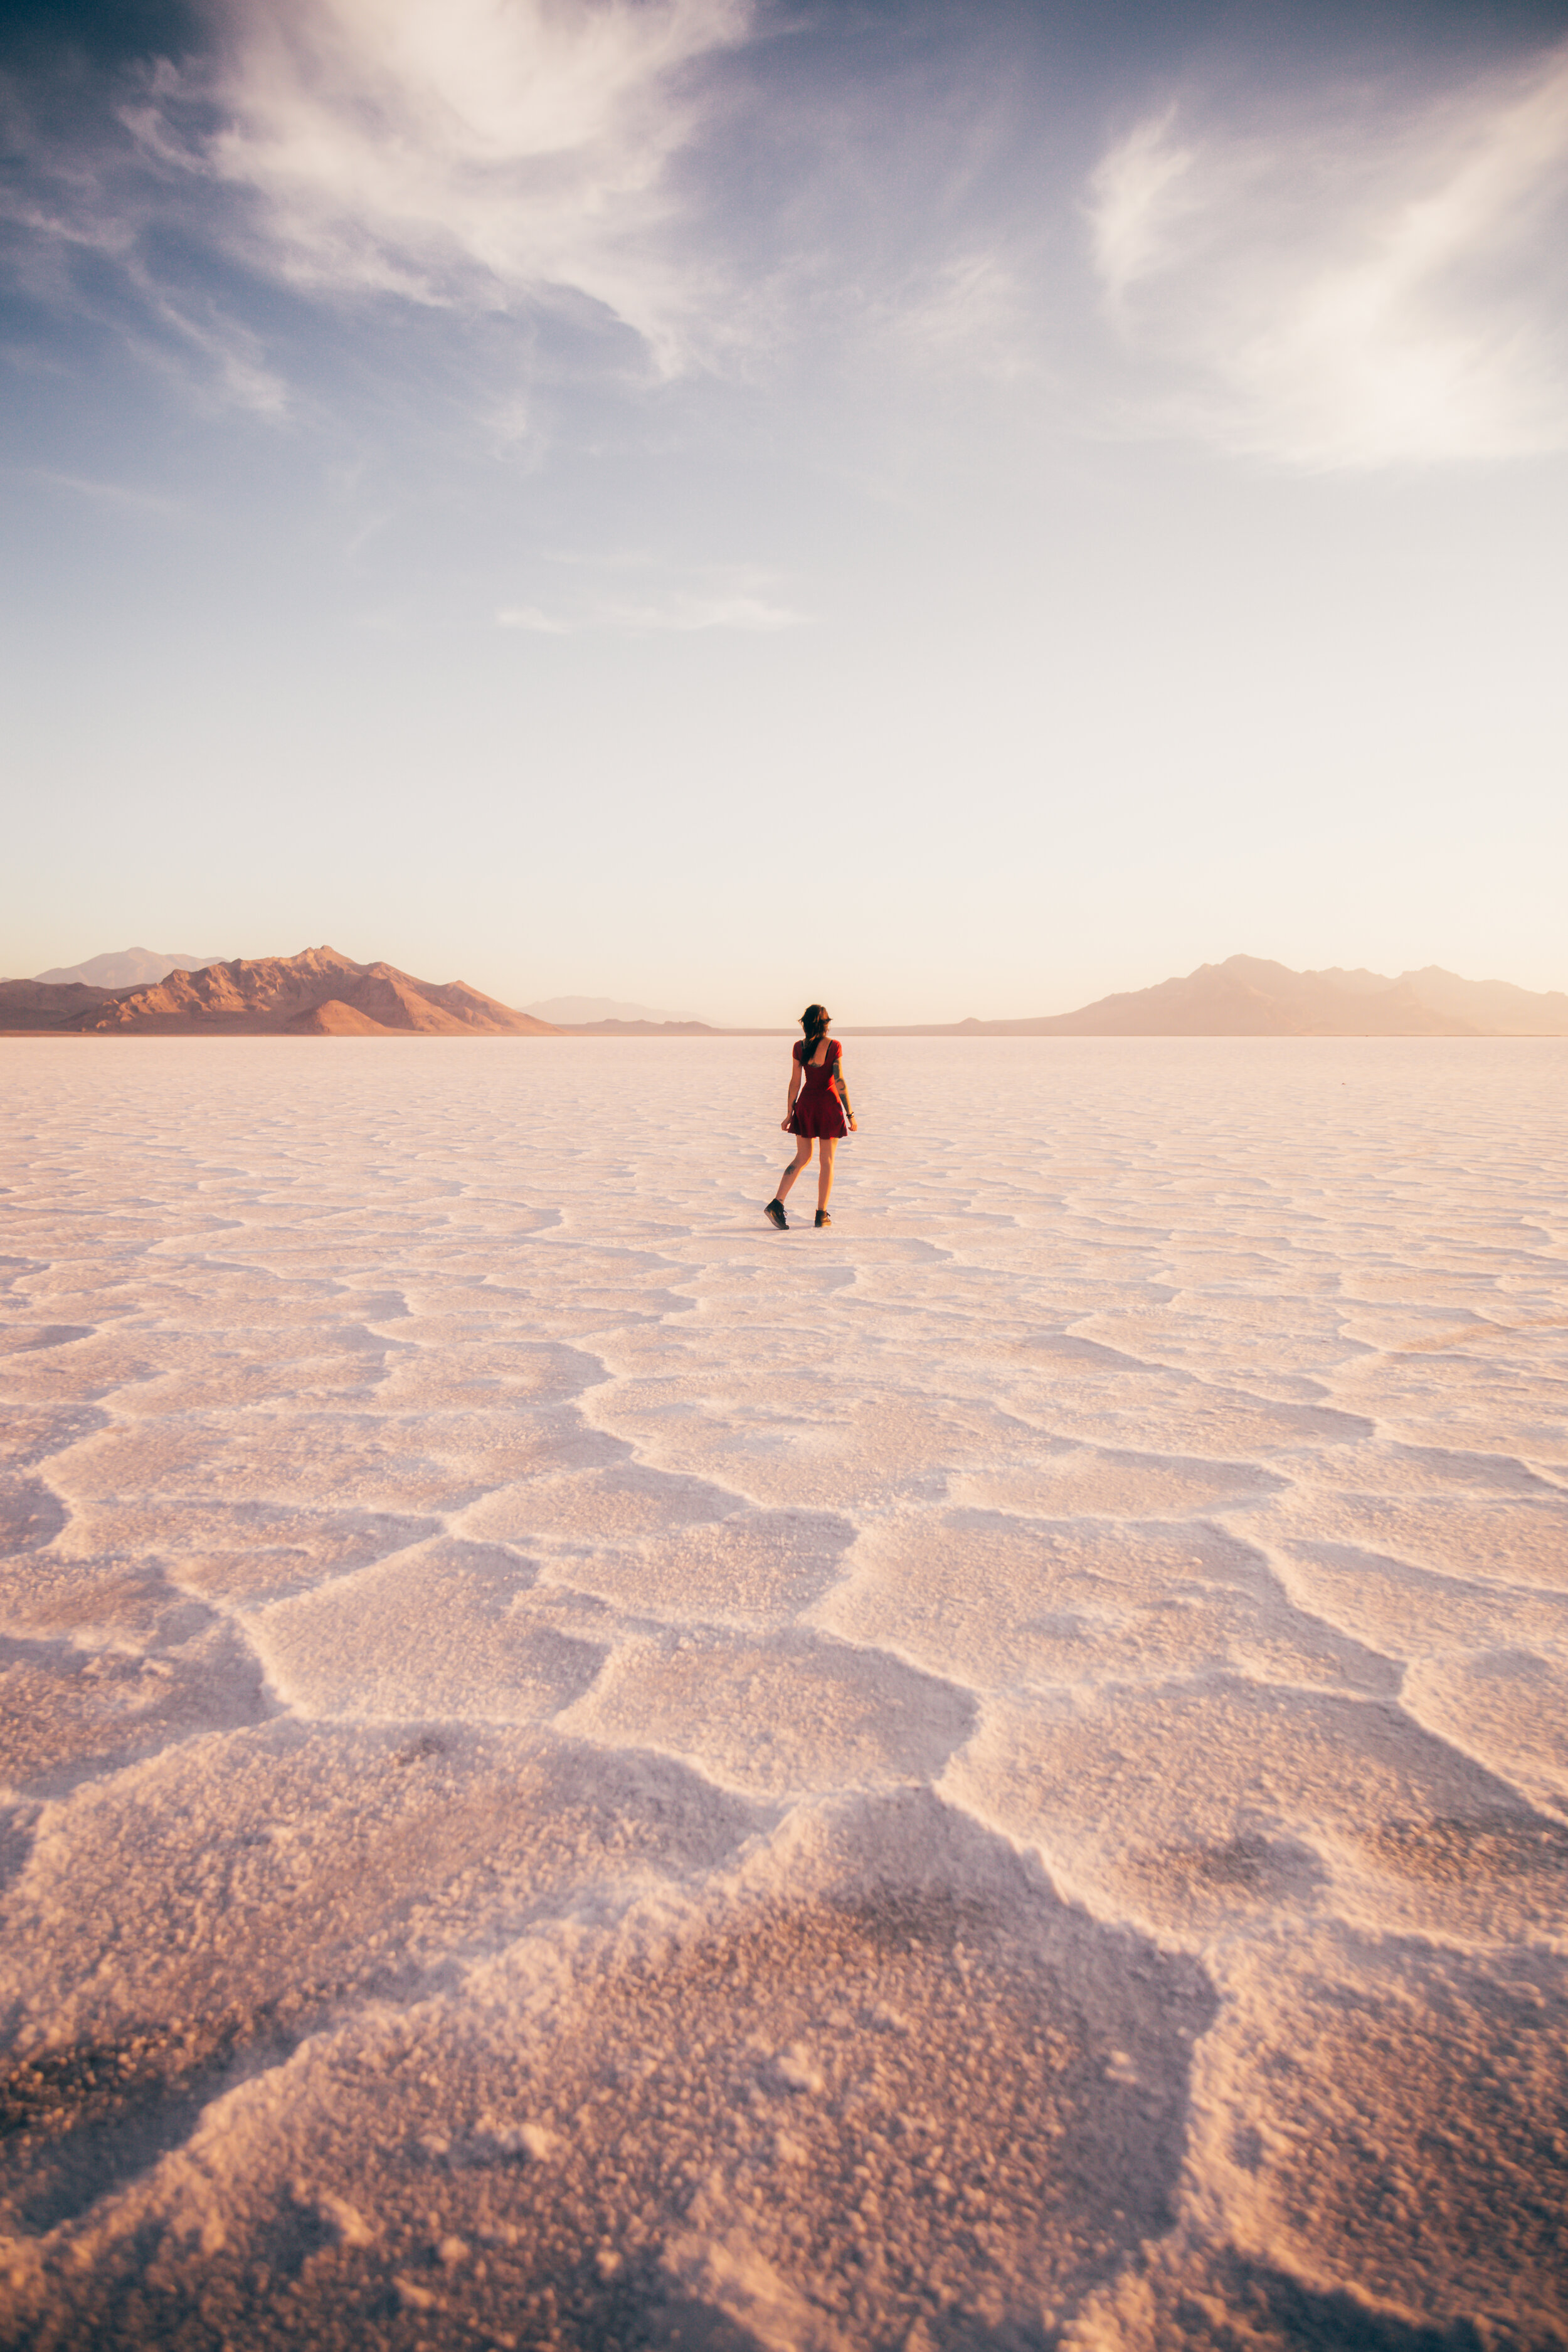
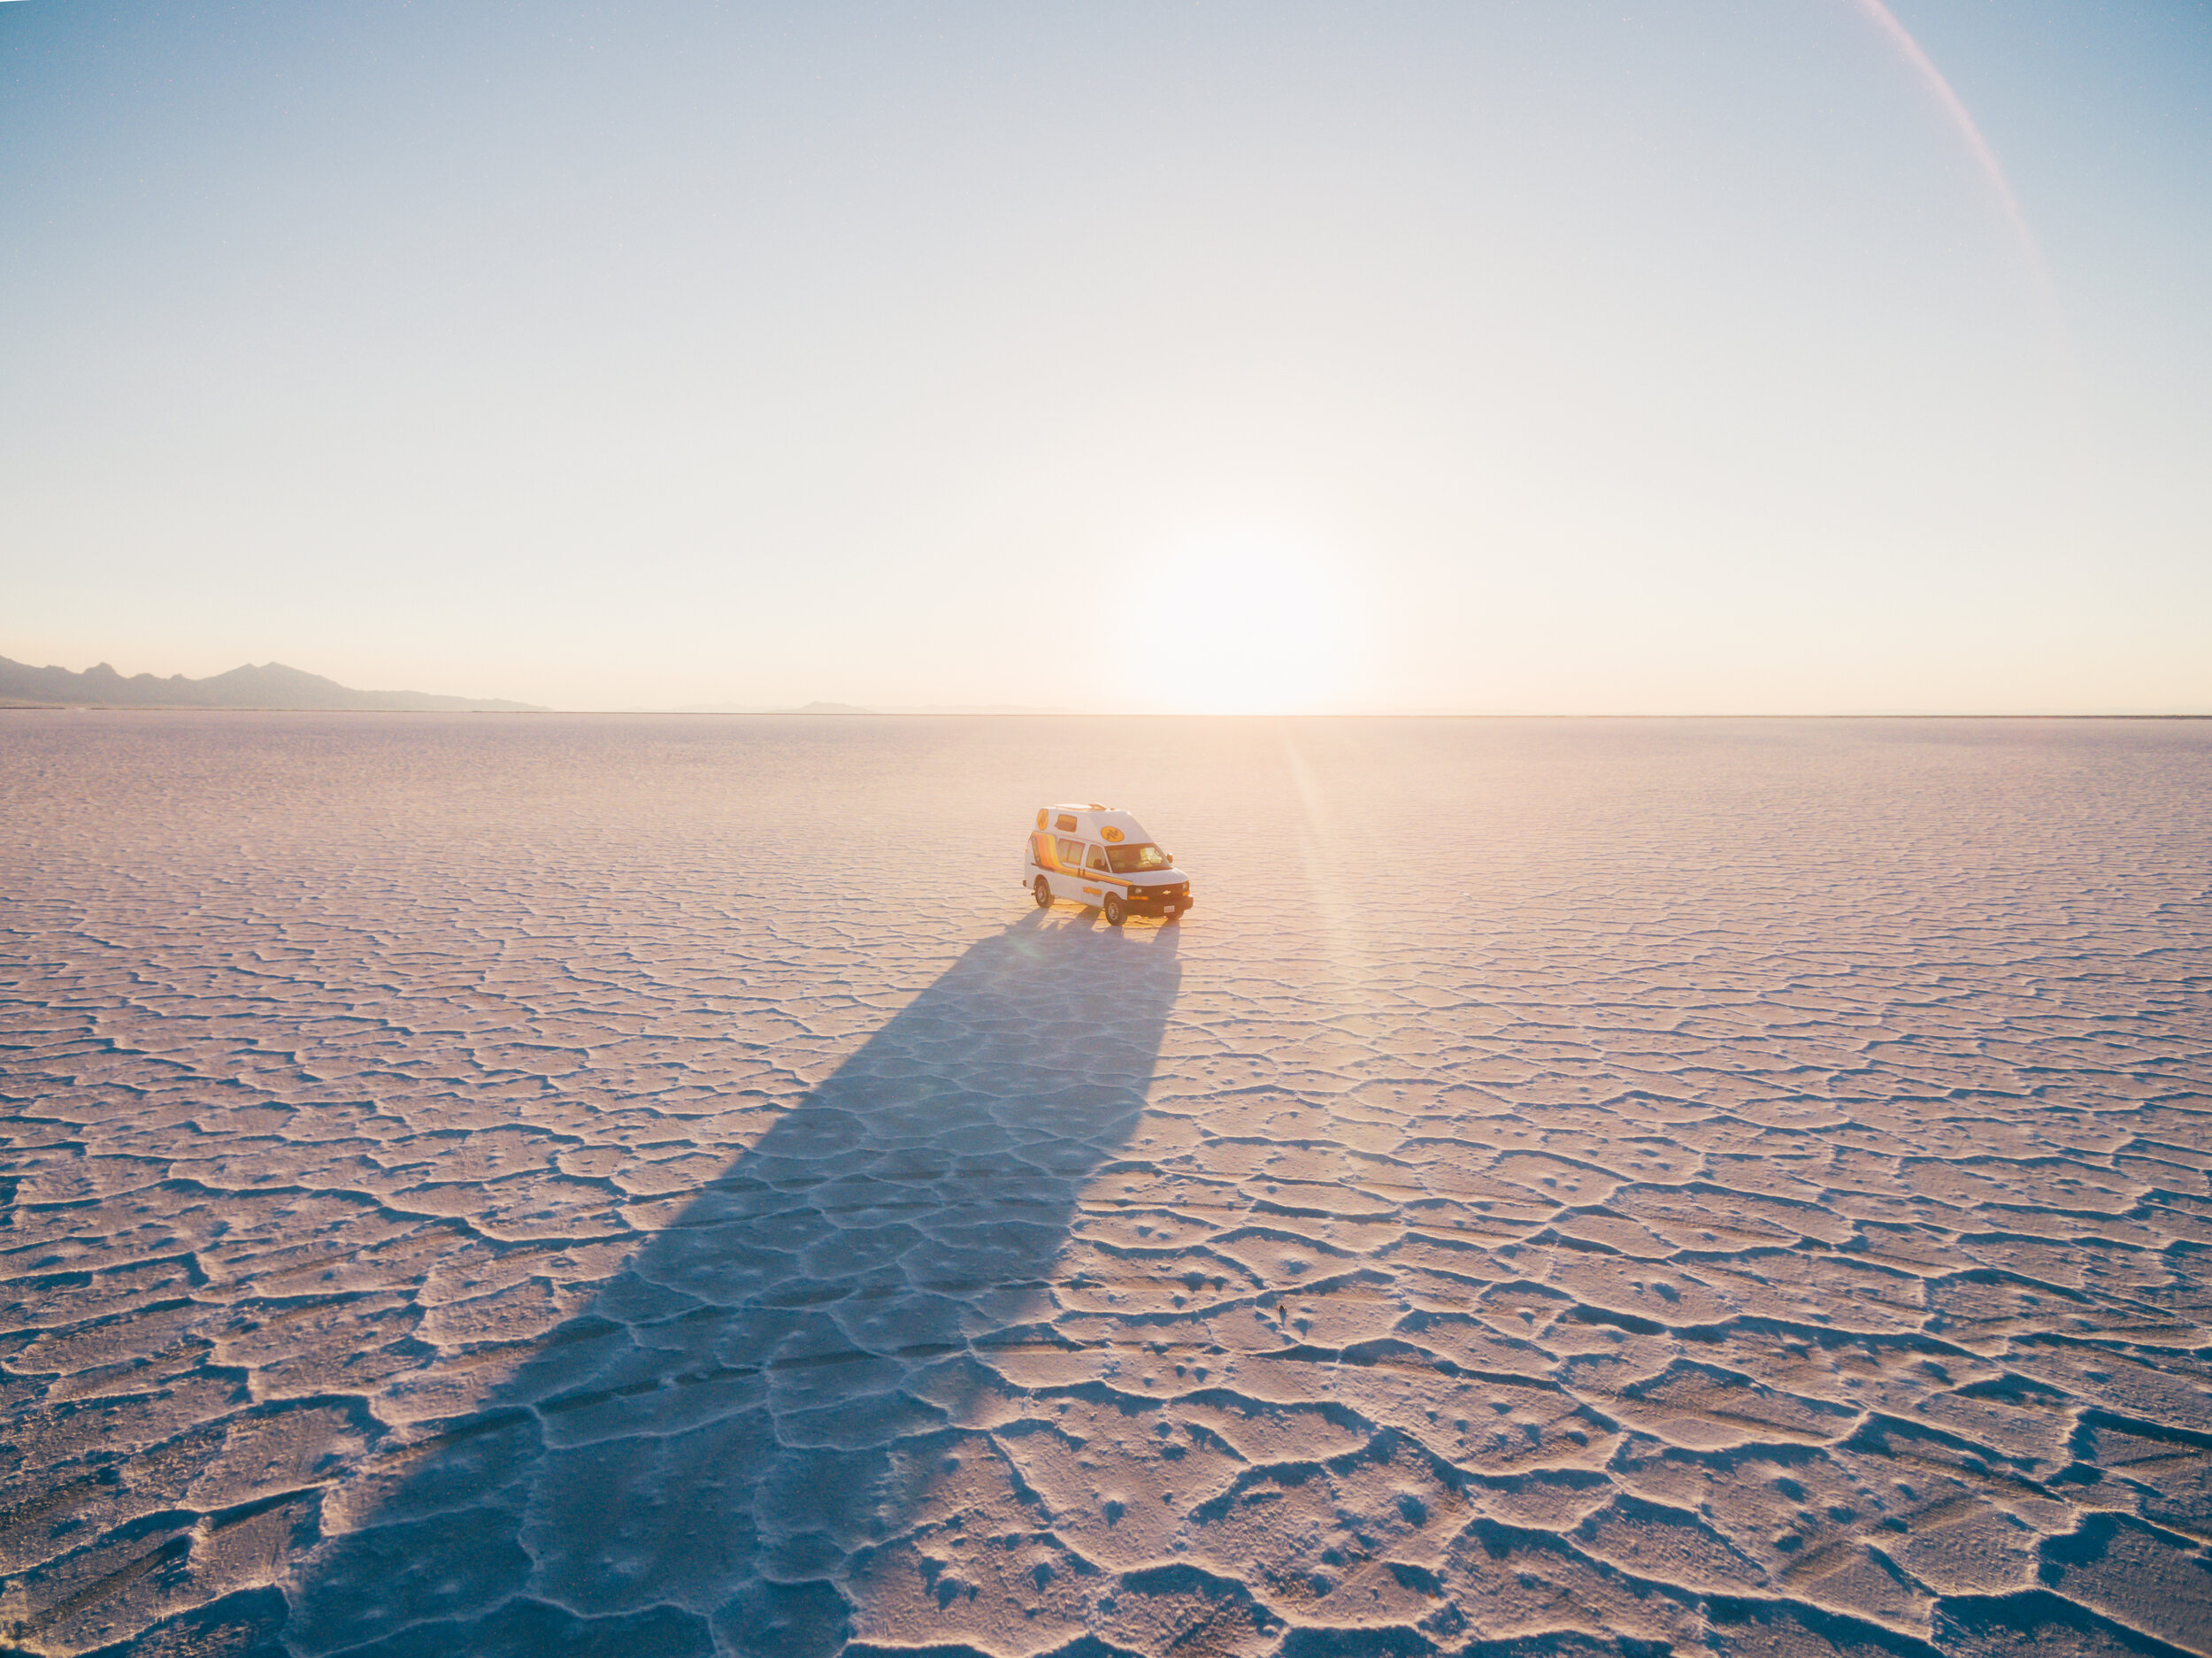
Day 1: Depart Travellers Autobarn SF location (actually in Hayward) at 9:30am. We drove back to Oakland for a quick 45minute stop to pack up the campervan with our stuff, and by 11am we were on our way. Our first destination was Utah; the Salt Flats to be exact. We reached here roughly 11:30PM, and we did not shoot sunset. The drive to the Salt Flats from Oakland will actually read roughly 10hrs on Google Maps, but you’ll need to stop for gas a couple times, and for food and the restroom. Give yourself extra time and don’t drive when you’re sleepy!
Day 2: Sunrise was roughly 5am, and we shot sunrise at the Salt Flats. From here, we drove all the way to Grand Teton National Park in Wyoming. We started driving around 7am and reached The Tetons around 4pm. We didn’t even enter the park this first day, because there’s so much to see and shoot right outside of the park. We spent sunset at Snake River Overlook.
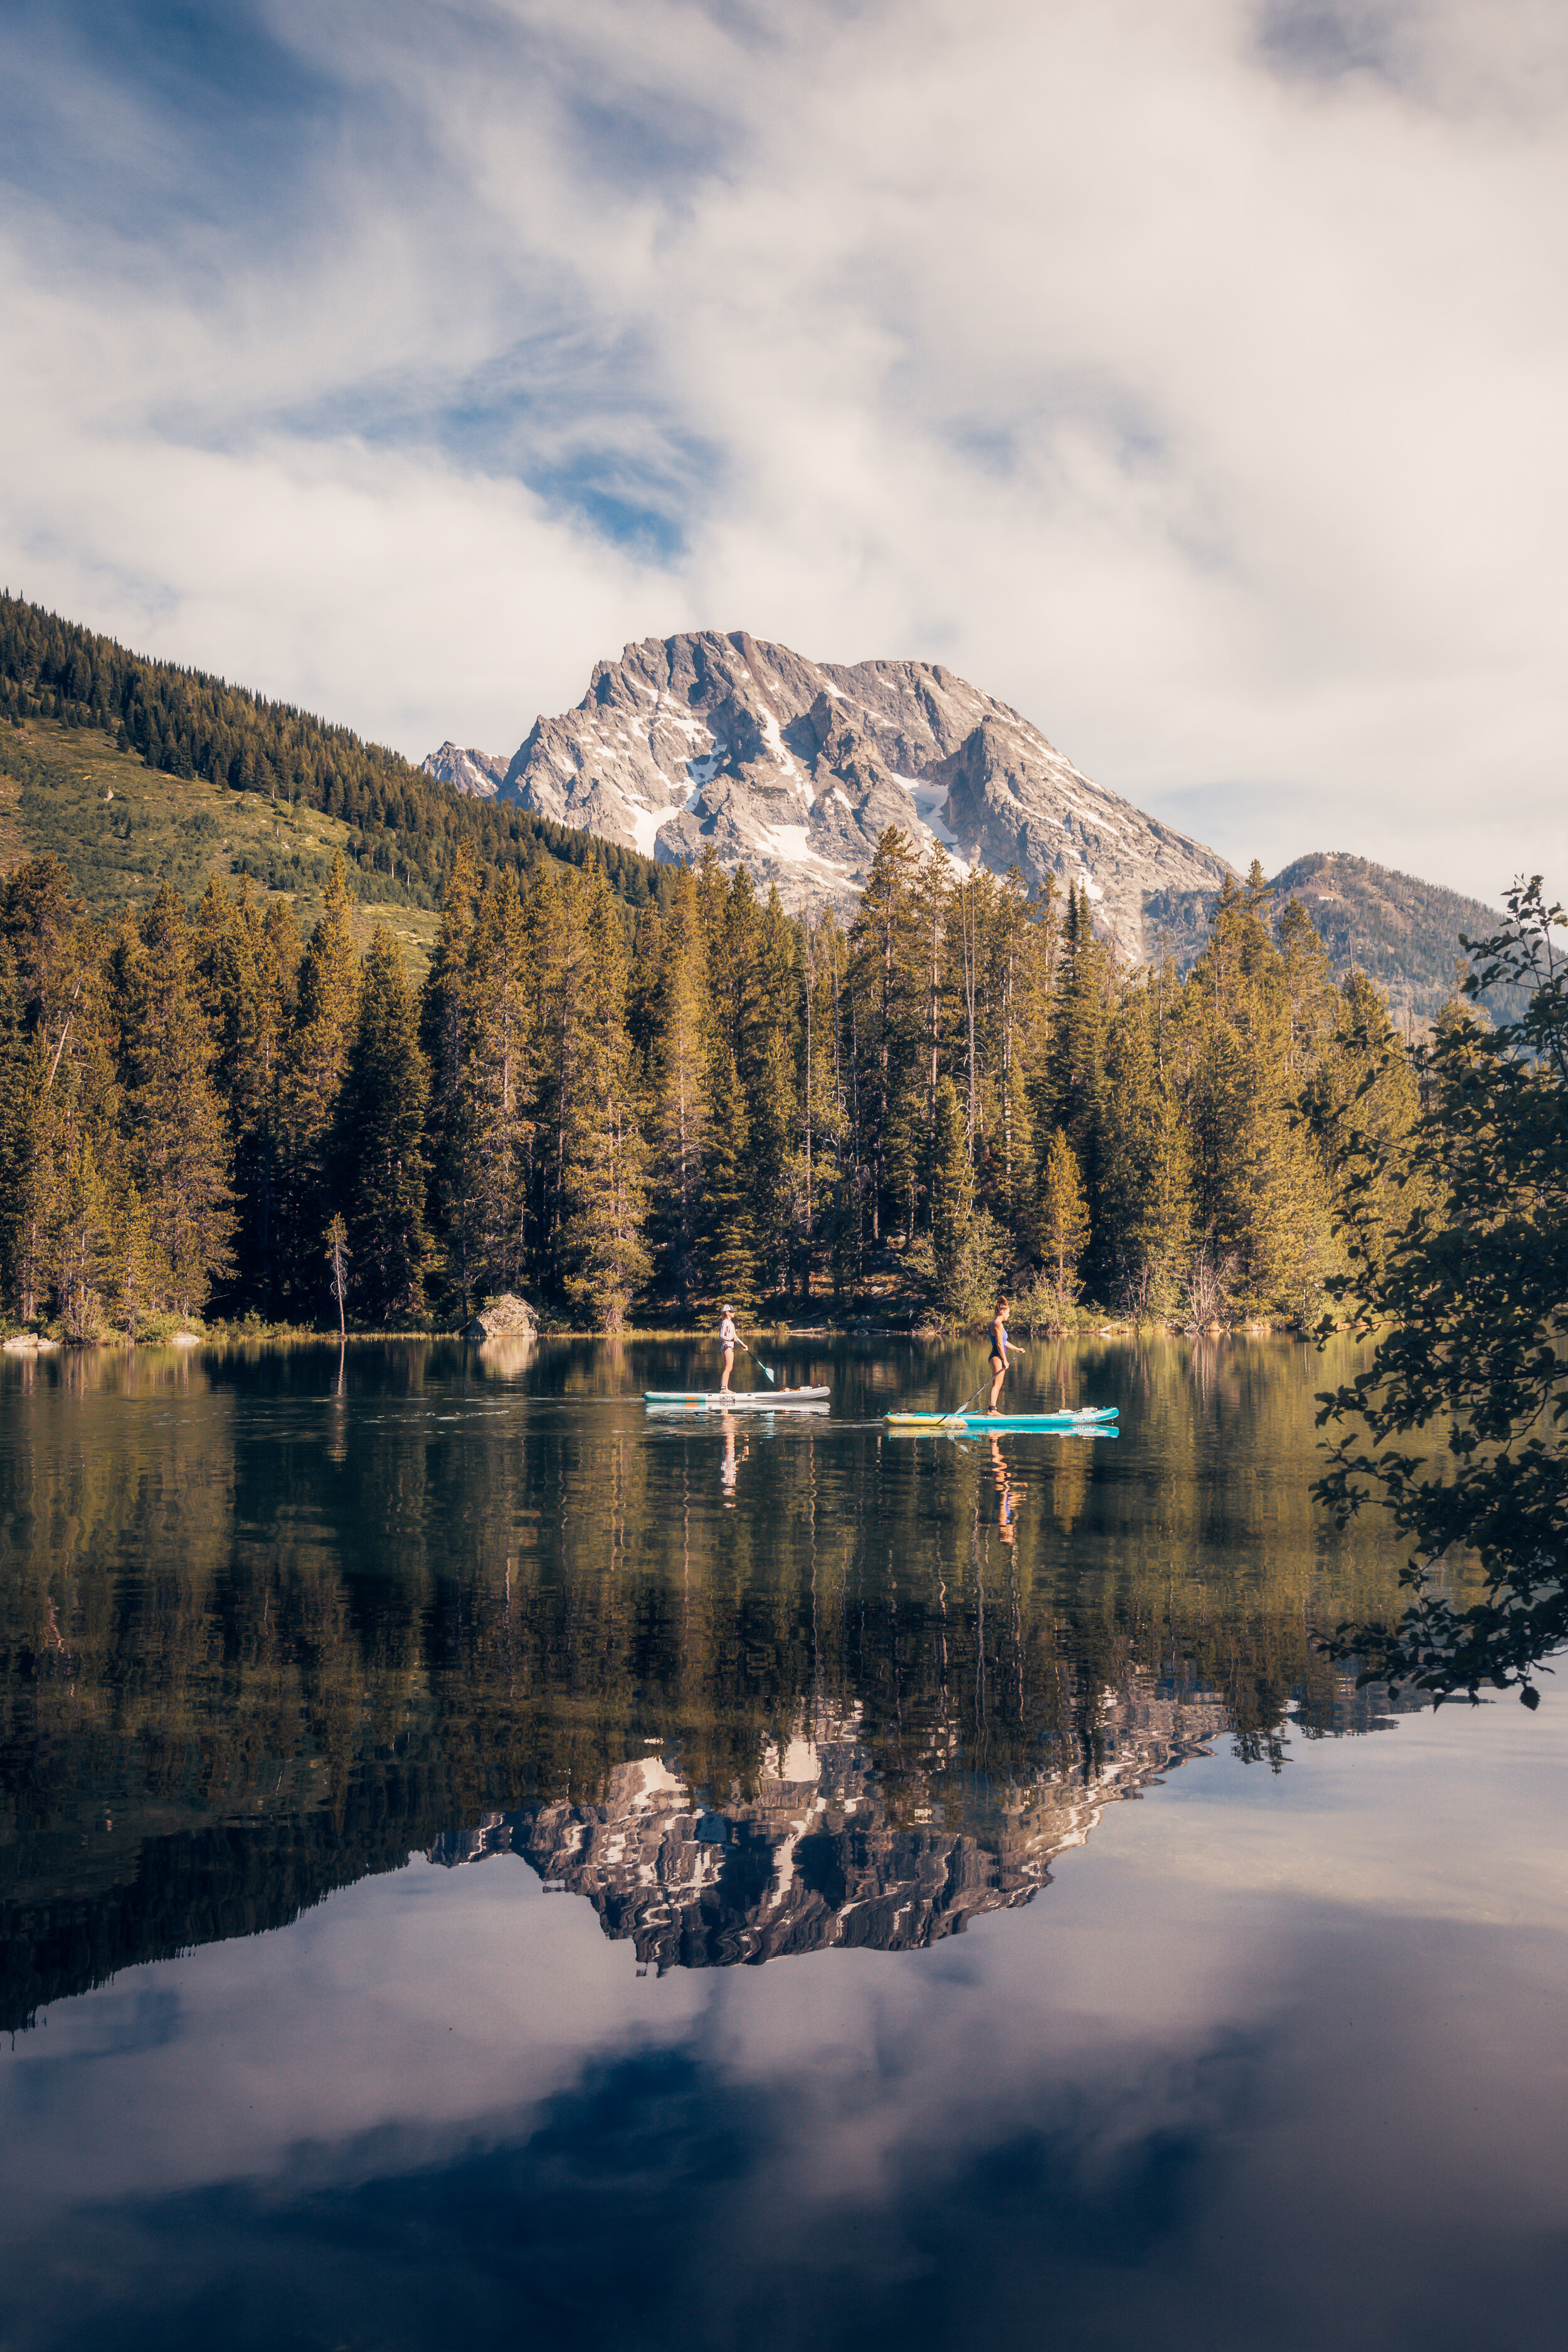
Day 3: We did not shoot sunrise. After shooting astro and sunrise and driving endlessly the first day, we were both so exhausted — our mistake tho, the sky was burning for sunrise this day. We entered the park this day, and we explored a ton. Grand Teton National Park is nothing short of incredible, and I’d highly recommend anyone staying at least a week out here. For sunset, we shot Oxbow Bend. And I also came back here for astro. We booked a campsite for this night, so that the next morning we could refill our water tank in the campervan before driving a distance.
Day 4: We shot sunrise outside of the park with my friend Ethan at that famous street that has the perfect lineup to The Tetons. Would highly recommend. Also would highly recommend you to not leave your camera unattended because cars are speeding down that road. After sunrise, we drove not even 30 minutes north to Yellowstone where we spent the day exploring all the geysers. For sunset, we shot at Artists Point Overlook which overlooks the Grand Canyon of Yellowstone National Park.
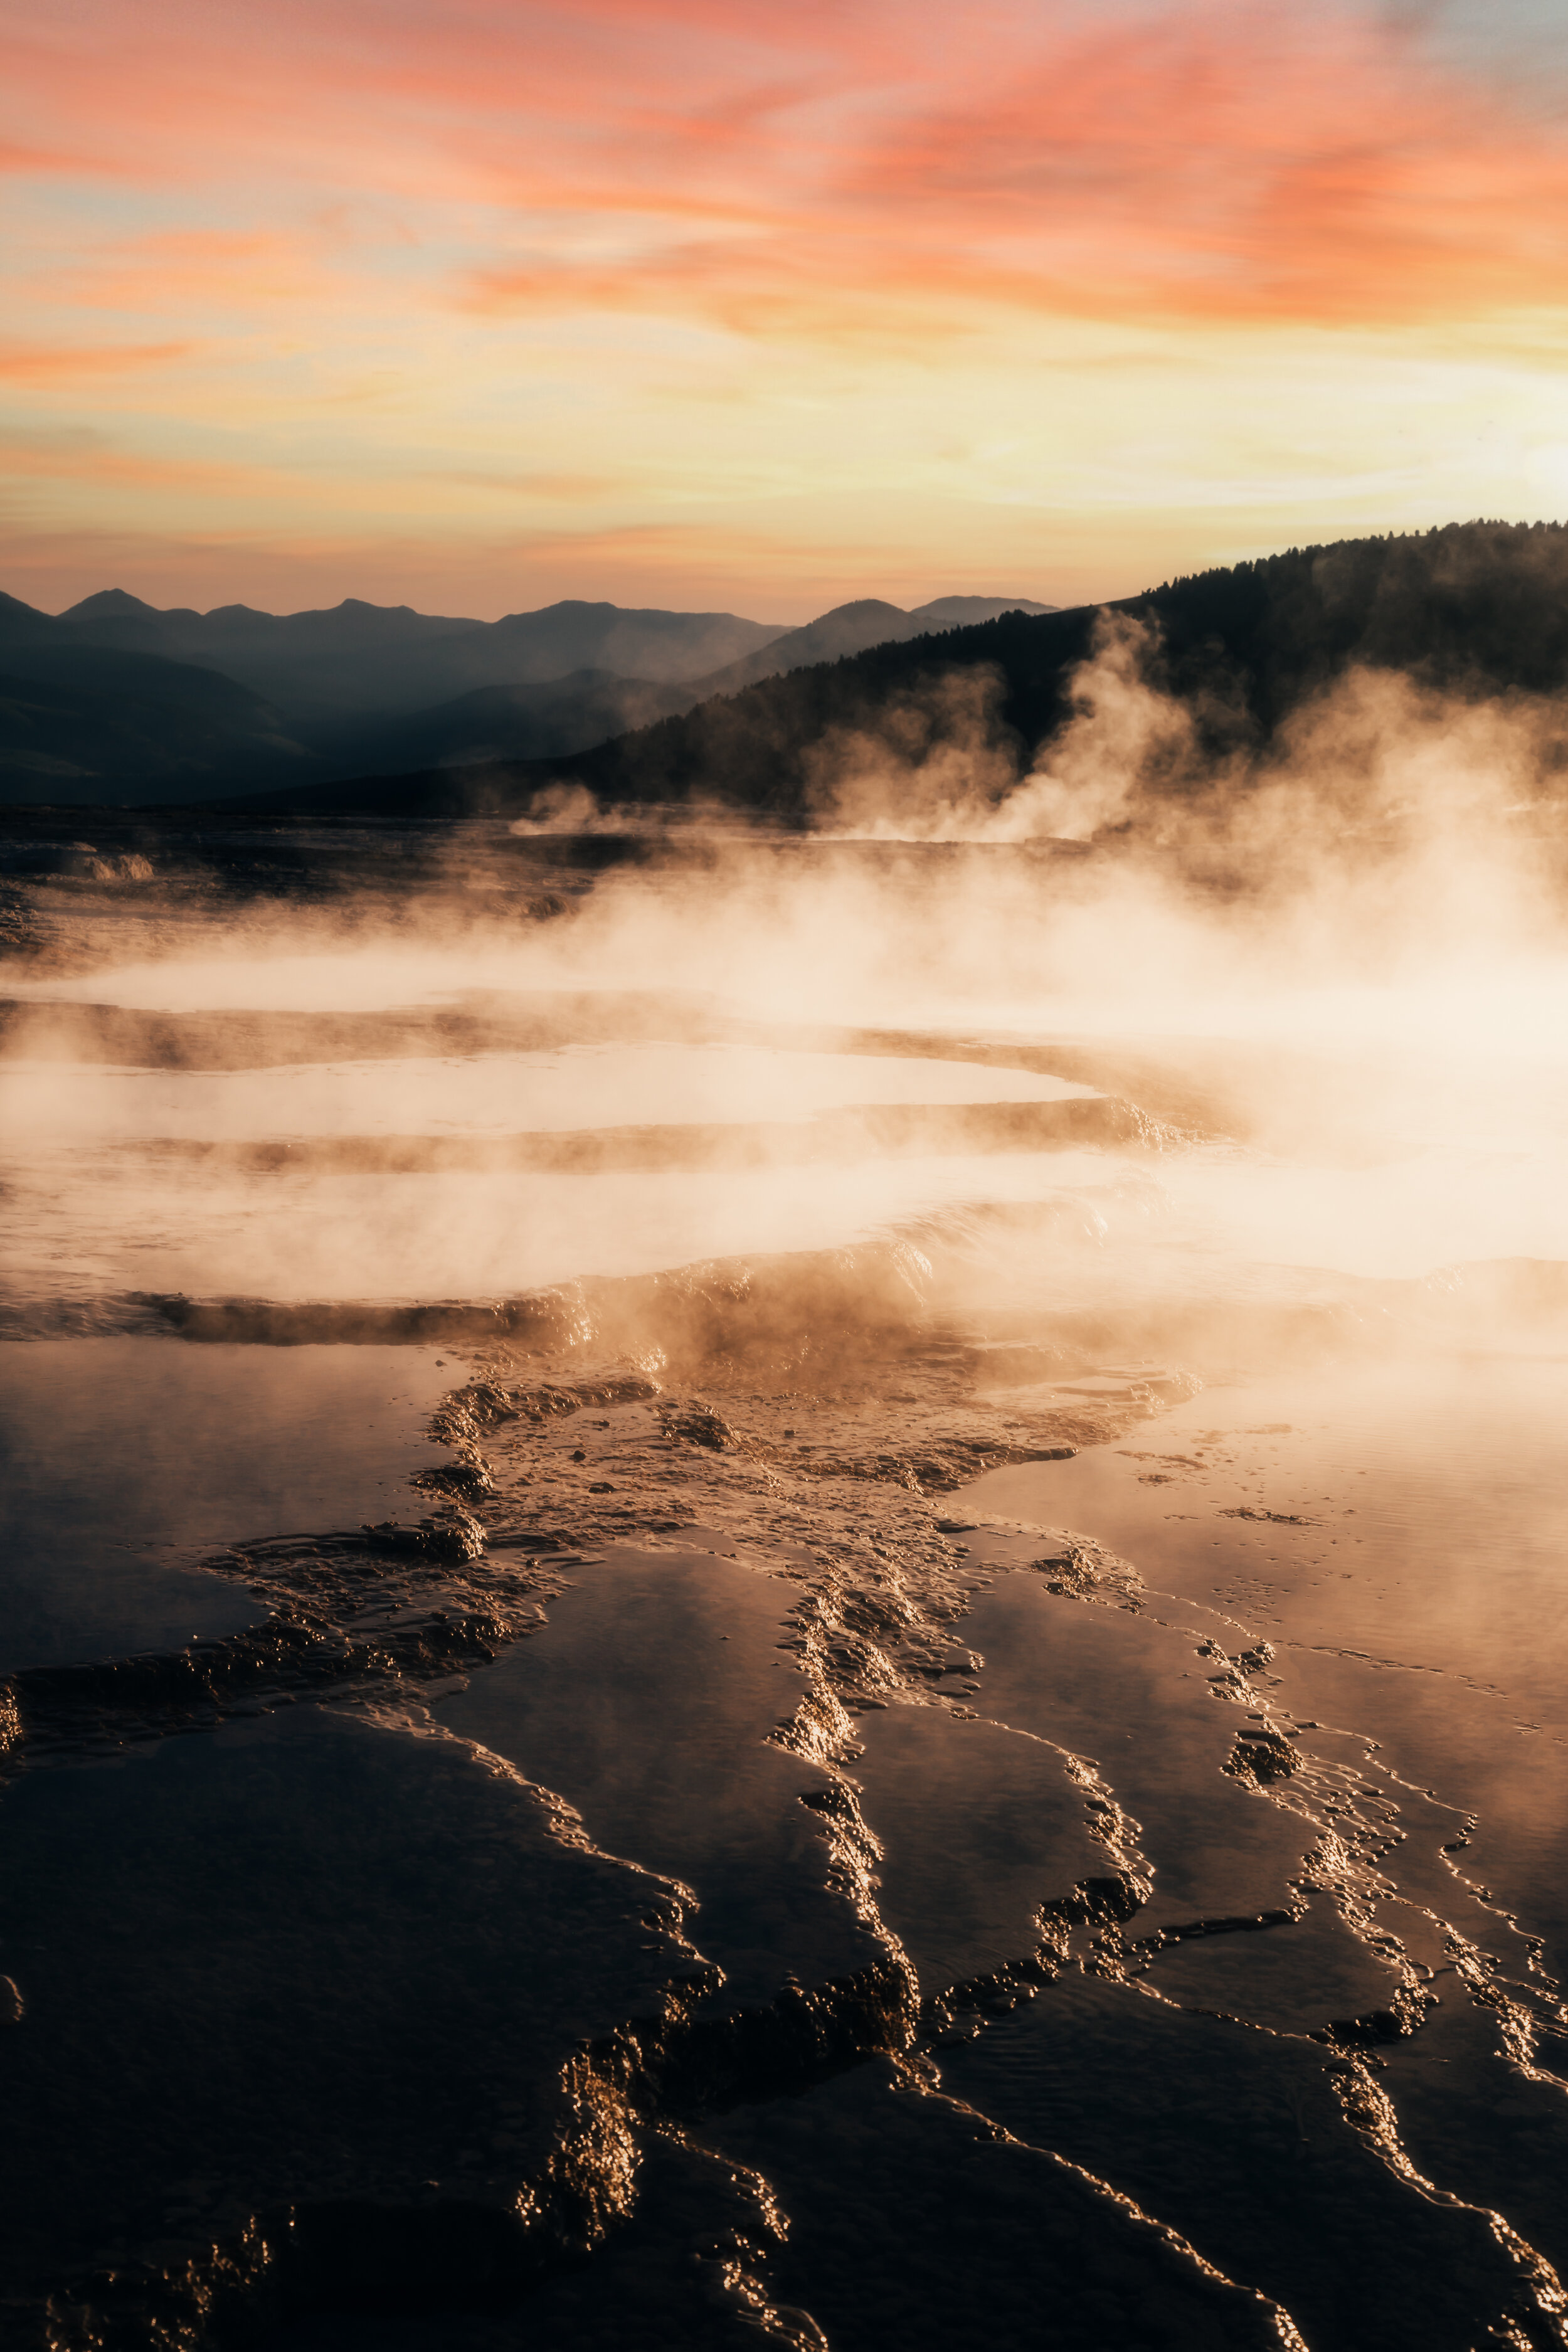
Day 5: We woke up for sunrise around 4:30, and we shot sunrise at the Mammoth Hot Springs. I could not recommend this location to enough people. It is beyond stunning. There’s so much to see here, and I highly suggest exploring the entire location before settling down on one spot. After sunrise, we shot a few more geysers and explored what we weren’t able to the day before. We then drove south to Utah to start making our way back home.
Day 6: We shot sunrise again at the Salt Flats (we needed to end our trip early because Alex got called back into work. If he didn’t, we would have stayed at Yellowstone another day). We made the long drive once again from the Salt Flats back to the Bay Area. We arrived around 7pm. After taking a much needed long shower, I picked up another friend and we drove north to Point Reyes.
Day 7: My last sunrise was spent at Point Reyes. It was super foggy along the coast, which made for some epic moody shots. We made our way back to the East Bay and returned the campervan around 11am.
Something to always remember for all of your trips: Do NOT rush yourself. Enjoy wherever you are, and embrace the moment you’re currently in. Before you know it, you’ll be back to reality wishing you were still there.